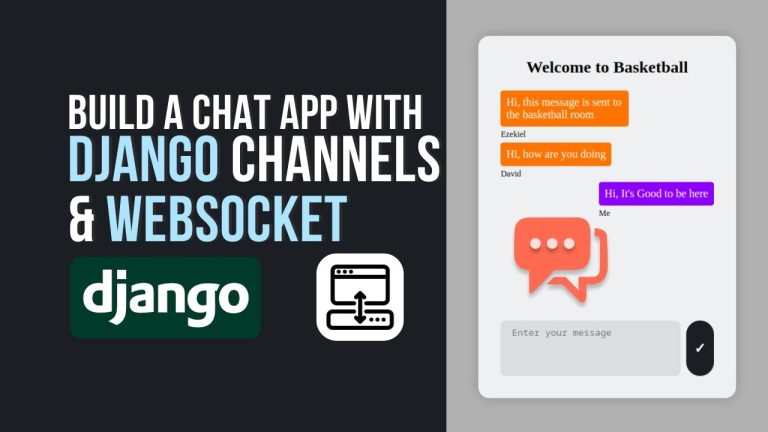
Build a Full-Stack Chat App with Django and Socket.IO

Moving beyond standard CRUD applications is a hallmark of a growing developer. One of the most rewarding and educational projects you can build is a real-time chat application. It forces you to think about asynchronous communication, state management, and creating a dynamic user experience. Today, we’re going to build a full-featured chat app from scratch using the power of Django and the real-time magic of Socket.IO.
This tutorial will guide you through every step, from setting up the project and building the Django backend to creating a responsive frontend that communicates in real-time. Let’s get started!
This project is perfect for your portfolio! It demonstrates your ability to work with modern async Python, manage real-time events, and build a full-stack application from the ground up.
Part 1: Project Setup and Dependencies
First, let’s set up our project directory and install all the necessary libraries. We’ll need Django for the web framework, python-socketio for WebSocket communication, uvicorn as our ASGI server, and asgiref for handling async/sync conversions.
# Install all required packages
pip install django python-socketio uvicorn asgiref
With the dependencies installed, let’s create our Django project and the chat application.
# Create a new Django project
django-admin startproject djchatsocket

# Navigate into the new project folder
cd djchatsocket

# Create the chat app within the project
python manage.py startapp chat
Part 2: The Backend – Django and Socket.IO
Now we’ll build the core of our application, starting with the Django configuration and moving on to the real-time event handlers.
1. Configuring Django Settings
Open djchatsocket/settings.py. We need to add our new chat app to INSTALLED_APPS and configure our allowed hosts.
# In djchatsocket/settings.py

# Allow connections from localhost and any IP on the local network
ALLOWED_HOSTS = ["0.0.0.0", "127.0.0.1"]

# Add the 'chat' app to the list of installed applications
INSTALLED_APPS = [
    'django.contrib.admin',
    'django.contrib.auth',
    'django.contrib.contenttypes',
    'django.contrib.sessions',
    'django.contrib.messages',
    'django.contrib.staticfiles',
    'chat',  # <-- Add this line
]
2. Defining Our Data Models
In chat/models.py, we need to define the structure for our chat rooms and messages. This will allow us to persist conversations in a database.
# In chat/models.py

from django.db import models
from django.utils import timezone

class Room(models.Model):
    name = models.CharField(max_length=100, unique=True)
    created_at = models.DateTimeField(auto_now_add=True)
    def __str__(self):
        return self.name

class Message(models.Model):
    room = models.ForeignKey(Room, on_delete=models.CASCADE, related_name='messages')
    username = models.CharField(max_length=100)
    content = models.TextField()
    timestamp = models.DateTimeField(default=timezone.now)
    class Meta:
        ordering = ['timestamp']
    def __str__(self):
        return f"{self.username} in {self.room.name}: {self.content[:20]}"
3. Creating the Views and URLs
We need two views: a login page to enter a username and room, and the chat page itself. Open chat/views.py and add the following:
# In chat/views.py

from django.shortcuts import render, redirect
from .models import Room, Message

def login_view(request):
    if request.method == 'POST':
        username = request.POST.get('username')
        room_name = request.POST.get('room_name').lower()

        if username and room_name:
            request.session['username'] = username
            request.session['room_name'] = room_name
            Room.objects.get_or_create(name=room_name) # Create room if it doesn't exist
            return redirect('chat', room_name=room_name)

    return render(request, 'login.html')

def chat_view(request, room_name):
    username = request.session.get('username')
    if not username:
        return redirect('login')

    room_name = room_name.lower()

    try:
        room = Room.objects.get(name=room_name)
        messages = Message.objects.filter(room=room).order_by('-timestamp')[:50]
    except Room.DoesNotExist:
        messages = []

    # Format messages for the template to easily apply styles
    formatted_messages = [{
        'username': msg.username, 'content': msg.content, 'timestamp': msg.timestamp,
        'is_system': msg.username == 'System', 'is_current_user': msg.username == username,
    } for msg in messages]

    context = {
        'room_name': room_name,
        'username': username,
        'messages': list(reversed(formatted_messages))  # Show oldest first
    }
    return render(request, 'chat.html', context)
Now, let's wire up these views in djchatsocket/urls.py:
# In djchatsocket/urls.py

from django.contrib import admin
from django.urls import path
from chat import views

urlpatterns = [
    path('admin/', admin.site.urls),
    path('', views.login_view, name='login'),
    path('chat/<str:room_name>/', views.chat_view, name='chat'),
]
4. The Real-Time Magic: Socket.IO Events
This is the core of our real-time functionality. Create a new file, chat/socketio_events.py. This file will handle all WebSocket connections and events like joining a room or sending a message. We use sync_to_async to allow our async Socket.IO events to safely interact with the synchronous Django ORM.
# In chat/socketio_events.py

import socketio
from datetime import datetime, timezone
from asgiref.sync import sync_to_async
from .models import Room, Message

sio = socketio.AsyncServer(async_mode='asgi', cors_allowed_origins='*')
connected_clients = {}

get_or_create_room = sync_to_async(Room.objects.get_or_create, thread_sensitive=True)
create_message = sync_to_async(Message.objects.create, thread_sensitive=True)

@sio.event
async def connect(sid, environ):
    print(f"Client connected: {sid}")

@sio.event
async def disconnect(sid):
    print(f"Client disconnected: {sid}")
    if sid in connected_clients:
        room_name = connected_clients[sid]['room']
        username = connected_clients[sid]['username']
        await save_and_broadcast_message(
            room_name=room_name, username='System',
            message=f'{username} has left the room'
        )
        del connected_clients[sid]

async def save_and_broadcast_message(room_name, username, message):
    room_obj, _ = await get_or_create_room(name=room_name)

    if username != 'System':
        msg = await create_message(room=room_obj, username=username, content=message)
        timestamp = msg.timestamp.isoformat()
    else:
        timestamp = datetime.now(timezone.utc).isoformat()

    await sio.emit('message', {
        'username': username, 'message': message, 'timestamp': timestamp
    }, room=room_name)

@sio.event
async def join(sid, data):
    username = data.get('username')
    room_name = data.get('room').lower()
    connected_clients[sid] = {'username': username, 'room': room_name}
    await sio.enter_room(sid, room_name)
    await save_and_broadcast_message(
        room_name=room_name, username='System',
        message=f'{username} has joined the room'
    )

@sio.event
async def send_message(sid, data):
    if sid in connected_clients:
        user = connected_clients[sid]
        await save_and_broadcast_message(
            room_name=user['room'], username=user['username'], message=data.get('message')
        )
5. Bridging Django and Socket.IO with ASGI
The final step for our backend is to tell Django how to handle both standard HTTP requests and WebSocket connections. We do this in djchatsocket/asgi.py by wrapping our Django application with the Socket.IO ASGI app.
# In djchatsocket/asgi.py

import os
from django.core.asgi import get_asgi_application
import socketio

os.environ.setdefault('DJANGO_SETTINGS_MODULE', 'djchatsocket.settings')
django_app = get_asgi_application()

# Import the sio instance from your events file
from chat.socketio_events import sio

# Wrap the Django app with the Socket.IO app
application = socketio.ASGIApp(sio, django_app)
Part 3: The Frontend - Bringing the Chat to Life
With the backend ready, we'll create the templates. Create a new `templates` folder inside your `chat` app directory.
1. The Base Template (chat/templates/base.html)
This file provides the basic HTML structure and all the CSS needed for our app. In a production app, you'd link an external stylesheet, but for this tutorial, we'll include it directly.
<!DOCTYPE html>
<html lang="en">
<head>
    <meta charset="UTF-8">
    <meta name="viewport" content="width=device-width, initial-scale=1.0">
    <title>Django - SocketIO Chat App</title>
    <link href="https://fonts.googleapis.com/css2?family=Poppins:wght@300;400;500;600&display=swap" rel="stylesheet">
    <style>
        :root {
            --primary: #4361ee; --secondary: #3f37c9; --success: #4cc9f0; --danger: #f72585;
            --light: #f8f9fa; --dark: #212529; --gray: #6c757d; --light-gray: #e9ecef;
            --border-radius: 8px; --shadow: 0 4px 6px rgba(0, 0, 0, 0.1);
        }
        * { margin: 0; padding: 0; box-sizing: border-box; font-family: 'Poppins', sans-serif; }
        body { background-color: #f5f7fb; color: var(--dark); min-height: 100vh; display: flex; justify-content: center; align-items: center; padding: 20px; }
        .container { width: 100%; max-width: 800px; } /* Changed max-width */
        .card { background: white; border-radius: var(--border-radius); box-shadow: var(--shadow); overflow: hidden; }
        .card-header { background-color: var(--primary); color: white; padding: 20px; text-align: center; }
        .card-body { padding: 25px; }
        .btn { background-color: var(--primary); color: white; border: none; padding: 12px 25px; border-radius: var(--border-radius); cursor: pointer; font-size: 16px; font-weight: 500; transition: all 0.3s ease; }
        .btn:hover { background-color: var(--secondary); transform: translateY(-2px); }
        .btn-block { display: block; width: 100%; }
        .form-group { margin-bottom: 20px; }
        .form-control { width: 100%; padding: 12px 15px; border: 1px solid var(--light-gray); border-radius: var(--border-radius); font-size: 16px; }
        .form-control:focus { outline: none; border-color: var(--primary); box-shadow: 0 0 0 3px rgba(67, 97, 238, 0.2); }
        .chat-container { display: flex; flex-direction: column; height: 80vh; max-height: 700px; }
        .chat-header { background-color: var(--primary); color: white; padding: 15px 20px; border-top-left-radius: var(--border-radius); border-top-right-radius: var(--border-radius); }
        .chat-messages { flex: 1; overflow-y: auto; padding: 20px; background-color: #f9f9ff; display: flex; flex-direction: column; gap: 15px; }
        .message { display: flex; flex-direction: column; max-width: 80%; animation: fadeIn 0.3s ease; }
        @keyframes fadeIn { from { opacity: 0; transform: translateY(10px); } to { opacity: 1; transform: translateY(0); } }
        .message-self { align-self: flex-end; }
        .message-other { align-self: flex-start; }
        .message-content { padding: 12px 15px; border-radius: 18px; display: inline-block; box-shadow: 0 1px 3px rgba(0,0,0,0.1); word-break: break-word; }
        .message-other .message-content { background-color: white; border: 1px solid #e6e6e6; border-top-left-radius: 4px; }
        .message-self .message-content { background-color: #4361ee; color: white; border-top-right-radius: 4px; }
        .message-info { margin-top: 5px; font-size: 12px; color: var(--gray); padding: 0 5px; }
        .message-username { font-weight: 500;}
        .system-message { text-align: center; margin: 10px 0; color: var(--gray); font-size: 13px; font-style: italic; }
        .chat-input { display: flex; padding: 15px; background-color: white; border:1px solid var(--light-gray); border-top:none; border-bottom-left-radius: var(--border-radius); border-bottom-right-radius: var(--border-radius); }
        .chat-input input { flex: 1; margin-right: 10px; }
    </style>
</head>
<body>
    <div class="container">
        {% block content %}{% endblock %}
    </div>
    {% block extra_js %}{% endblock %}
</body>
</html>
2. The Login Page (chat/templates/login.html)
{% extends "base.html" %}
{% block content %}
<div class="card" style="max-width: 500px; margin: 0 auto;">
    <div class="card-header">
        <h2>Join Chat Room</h2>
    </div>
    <div class="card-body">
        <form method="post">
            {% csrf_token %}
            <div class="form-group">
                <input type="text" name="username" class="form-control" placeholder="Enter your username" required>
            </div>
            <div class="form-group">
                <input type="text" name="room_name" class="form-control" placeholder="Enter room name" required>
            </div>
            <button type="submit" class="btn btn-block">Join Room</button>
        </form>
    </div>
</div>
{% endblock %}
3. The Chat Room (chat/templates/chat.html)
This template renders the chat interface and contains the crucial client-side JavaScript to connect to Socket.IO.
{% extends "base.html" %}
{% block content %}
<div class="card chat-container">
    <div class="chat-header">
        <h2>{{ room_name }} Chat Room</h2>
    </div>

    <div class="chat-messages" id="chat-messages">
        {% for message in messages %}
            <div class="message {% if message.username == 'System' %}system-message{% elif message.is_current_user %}message-self{% else %}message-other{% endif %}">
                {% if message.username != 'System' %}
                <div class="message-content">{{ message.content }}</div>
                <div class="message-info">
                    <span class="message-username">{% if not message.is_current_user %}{{ message.username }}{% endif %}</span>
                    <span class="message-time">{{ message.timestamp|date:"H:i" }}</span>
                </div>
                {% else %}
                    {{ message.content }}
                {% endif %}
            </div>
        {% endfor %}
    </div>

    <div class="chat-input">
        <input type="text" id="message-input" class="form-control" placeholder="Type your message..." autocomplete="off">
        <button class="btn" id="send-button">Send</button>
    </div>
</div>
{% endblock %}

{% block extra_js %}
<script src="https://cdnjs.cloudflare.com/ajax/libs/socket.io/4.4.1/socket.io.js"></script>
<script>
    document.addEventListener('DOMContentLoaded', function() {
        const roomName = "{{ room_name|lower }}";
        const username = "{{ username }}";
        const socket = io();

        socket.emit('join', { username: username, room: roomName });

        socket.on('message', function(data) {
            appendMessage(data);
        });

        function appendMessage(data) {
            const messagesContainer = document.getElementById('chat-messages');
            const isSystem = data.username === 'System';
            const isCurrentUser = data.username === username;

            const messageElement = document.createElement('div');
            let messageHtml = '';

            if (isSystem) {
                messageElement.className = 'system-message';
                messageElement.textContent = data.message;
            } else {
                messageElement.className = isCurrentUser ? 'message message-self' : 'message message-other';
                messageHtml = `
                    <div class="message-content">${data.message}</div>
                    <div class="message-info">
                        <span class="message-username">${!isCurrentUser ? data.username : ''}</span>
                        <span class="message-time">
                            ${new Date(data.timestamp).toLocaleTimeString([], {hour: '2-digit', minute:'2-digit'})}
                        </span>
                    </div>
                `;
                messageElement.innerHTML = messageHtml;
            }

            messagesContainer.appendChild(messageElement);
            messagesContainer.scrollTop = messagesContainer.scrollHeight;
        }

        const messageInput = document.getElementById('message-input');
        const sendButton = document.getElementById('send-button');

        function sendMessage() {
            const message = messageInput.value.trim();
            if (message) {
                socket.emit('send_message', { message: message });
                messageInput.value = '';
            }
        }

        sendButton.addEventListener('click', sendMessage);
        messageInput.addEventListener('keypress', function(e) { if (e.key === 'Enter') sendMessage(); });

        document.getElementById('chat-messages').scrollTop = document.getElementById('chat-messages').scrollHeight;
    });
</script>
{% endblock %}
Part 4: Running Your Application
Your chat app is now fully coded! The final step is to run the database migrations and start the server. The server must be run with uvicorn to handle the ASGI application.
# First, create the database tables for our models
python manage.py makemigrations
python manage.py migrate

# Now, run the ASGI server with Uvicorn
uvicorn djchatsocket.asgi:application --host 0.0.0.0 --port 8000 --reload
Now, open your browser to http://127.0.0.1:8000. You'll be greeted by the login screen. Enter a username and room name, open another browser window to do the same, and start chatting in real-time!
Conclusion: What You've Built
Congratulations! You've successfully built a sophisticated, real-time chat application. You've learned how to integrate a standard Django project with an asynchronous service like Socket.IO, persist messages in a database, and build a reactive frontend that listens for and displays events as they happen. This is a powerful skill set and a fantastic project to showcase.
For visual learners, keep an eye on our YouTube channel for a full video walkthrough of this project. Now, try to extend it! Add user avatars, typing indicators, or private messaging to take your skills to the next level.
Watch The Video
Watch on YouTubeHow did this article make you feel?
Share This Post
You Might Also Like
Learn how to build a real-time live location tracking web application from scratch using…

A comprehensive, step-by-step Python tutorial for beginners. Learn installation,…
Learn to build a real-time chat application from scratch using Django Channels and…

Learn how to build a feature-rich, real-time chat application from scratch using Django…
Leave a Reply